


Publishing Your Custom WordPress Plugin
This article is a translation of the following my article:
Original: ワードプレスで自作プラグインを公開する
* Translated automatically by Google.
* Please note that some links or referenced content in this article may be in Japanese.
* Comments in the code are basically in Japanese.
by bokumin
Publishing Your Custom WordPress Plugin
Introduction
WordPress plugins are fairly easy to publish and register. I hope this is helpful.
1. Create a plugin with PHP
Let’s start with the basic file structure.
For example, if you think, “I want to create an app called hogehoge,” you need to create a project with the following file structure.
hogehoge/
├── hogehoge.php         # メインファイル
├── readme.txt           # 必須ドキュメント
├── includes/            # 機能別のPHPファイル
├── assets/              # CSS, JavaScript, 画像
└── languages/           # 翻訳ファイル
Creating the main plugin file
The following header comment is required in the main plugin file (hogehoge.php).
<?php
/*
Plugin Name: プラグイン名
Plugin URI: https://example.com/plugin
Description: プラグインの説明
Version: 1.0.0
Author: あなたの名前
Author URI: https://example.com
License: GPL v2 or later
Text Domain: hogehoge
*/

// プラグインが直接アクセスされるのを防ぐ
if (!defined('ABSPATH')) {
    exit;
}
For your reference, I have included the plugins that I have published, so please refer to them if you wish. The content of the app is to change the font size depending on the device such as a smartphone or PC.
text-size-adjust
2. Testing and checking the plugin
Verification with Plugin Check
Once you have finished developing your plugin, you should check it for errors and warnings using the plugin Plugin Check.
The following are the steps.
- Install Plugin Check plugin
- Check the following items
- PHP warnings/errors
- Compliant with WordPress coding standards
- Security issues
- Using deprecated functions
Manual テストproject
In my case, the test environment was the local environment of my home server.
There are ways to create it using Docker or GithubActions, so if you are creating it yourself, we recommend finding a method that suits you.
- Verification of operation on different WordPress versions
- Compatibility with other plugins
- Works in a multisite environment
- Check with different PHP versions (if possible)
3. Plugin publishing procedure
3-1. Preparation on WordPress.org
Next, we will perform the procedure to publish the plugin.
In order to publish a plugin, you need to create an account at https://wordpress.org.
- Visit https://wordpress.org/plugins/developers/add/
- Read the guidelines
–https://developer.wordpress.org/coding-standards/wordpress-coding-standards/
–https://developer.wordpress.org/plugins/
–https://developer.wordpress.org/plugins/wordpress-org/detailed-plugin-guidelines/ - If there are no problems, upload the source code
3-2. Process of review (in my case)
Since this was my first time, I received various corrections and suggestions. Below are the proposed amendments that we received.
・Registered fields must be properly sanitized (convert data to a safe format) with register_setting()
・Do not use exec()/shell_exec() in PHP
・Uploaded ZIP file is different from the plugin name (because it was manually obtained from git)
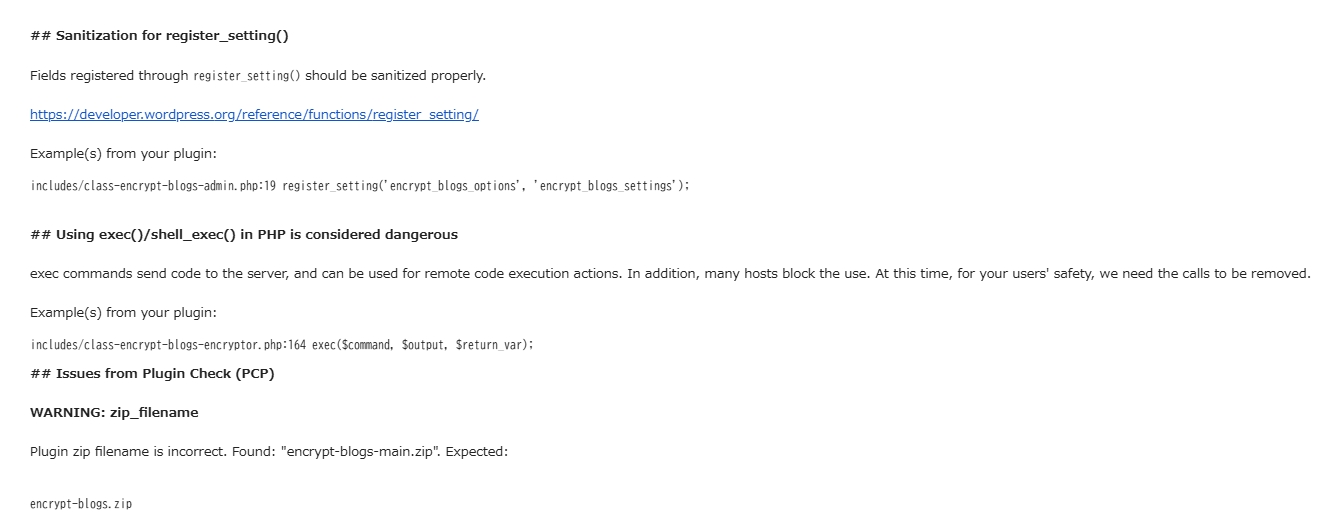
*You will receive an email from the review team like this.
To summarize,
- You will receive the review results via email within 7 to 10 days (in my case, I received the notification 8 days after uploading)
- If corrections are necessary, correct the points pointed out and resubmit (re-upload to https://wordpress.org/plugins/developers/add/)
*In my case, I received an approval email within an hour of making the corrections and submitting. I think the response will be faster after the fix. - If there are no problems, proceed to the publishing procedure
If your plugin request is approved, you will receive an email similar to the one below.
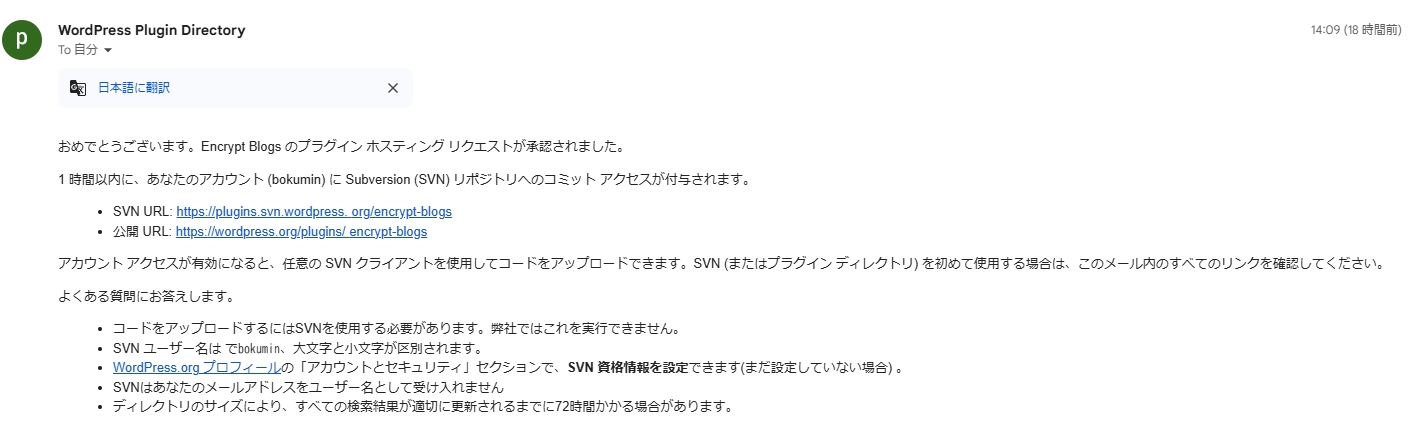
You need to upload the WordPress plugin using the SVN URL you received in this email and the SVN password you set.
SVN password can be set in your WordPress.org profile section (https://profiles.wordpress.org/bokumin/profile/edit/group/3/?screen=svn-password).
3-3. SVN environment setup
Next, we will install the SVN package. My OS is OpenSUSE, so I was able to install it using the following command. I think you can find it if you check other OS as well.
sudo zypper install subversion
Then, proceed with the following steps.
# プラグインのチェックアウト
# プラグインがhogehogeの場合
svn checkout https://plugins.svn.wordpress.org/hogehoge/ hogehoge
cd hogehoge
# wordpress.orgのユーザー名とパスワードを入力
svn auth --username USERNAME --password SVN_PASS
3-4. Deploying and committing files
If everything goes well so far, we will actually copy the plugin to the svn directory.
You need to create a directory with the latest project file of the current plugin in trunk, the header image (772×250) and plugin icon image (256×256) in assets, and the version name in tags, and copy the directory file of the corresponding version there.
# プラグインファイルのコピー
cp -r project/hogehoge/* ~/hogehoge/trunk/
cp -r project/hogehoge/* ~/hogehoge/1.0/*
cp icon-256x256.png banner-772x250.png ~/hogehoge/assets/

cd ~/hogehoge
svn add trunk/* --force
svn add assets/* --force
svn add tags/* --force

svn commit -m "Initial commit" --username USERNAME  --password svn_password
This is the end of uploading using SVN. If you want to update the plugin version in the future, you will need to do the following in the same way.
# trunkのコピー
svn cp trunk tags/1.0.1

# トランク内のファイルのアップデート
cp -r /path/to/updated/files/* trunk/

svn commit -m "Version 1.0.1 update" --username YOUR_USERNAME
4. Operation after publication~Version control
I use GitHub for source control.
Actually created app (https://github.com/bokumin/encrypt-blogs)
Support system
Let’s fix bugs and update by collecting user feedback and responding to wordpress.org’s support forum.
Summary
It’s a little long, but the above steps are necessary to publish a plugin on WordPress.
It may seem a little complicated, but if you follow the basic steps, you can proceed steadily. We especially recommend that you spend enough time on security and quality checks.
Referenced sites
I think there will be no problem if you create a plugin by referring to the site below.
I think you can understand it enough by using the translation function of the page.
WordPress Coding Standards
Plugin Developer Handbook
WordPress Plugin Guidelines